 Pin It
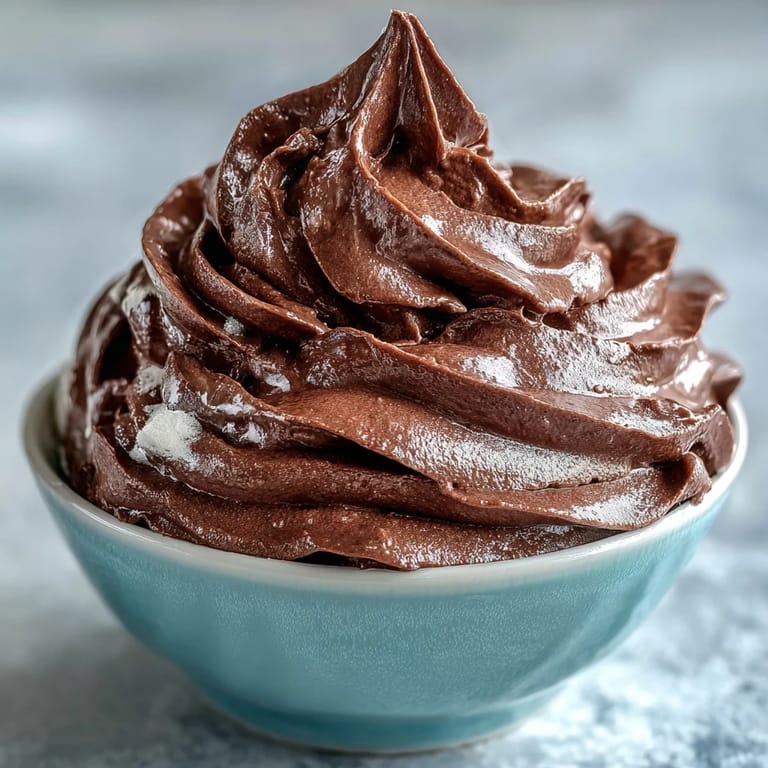
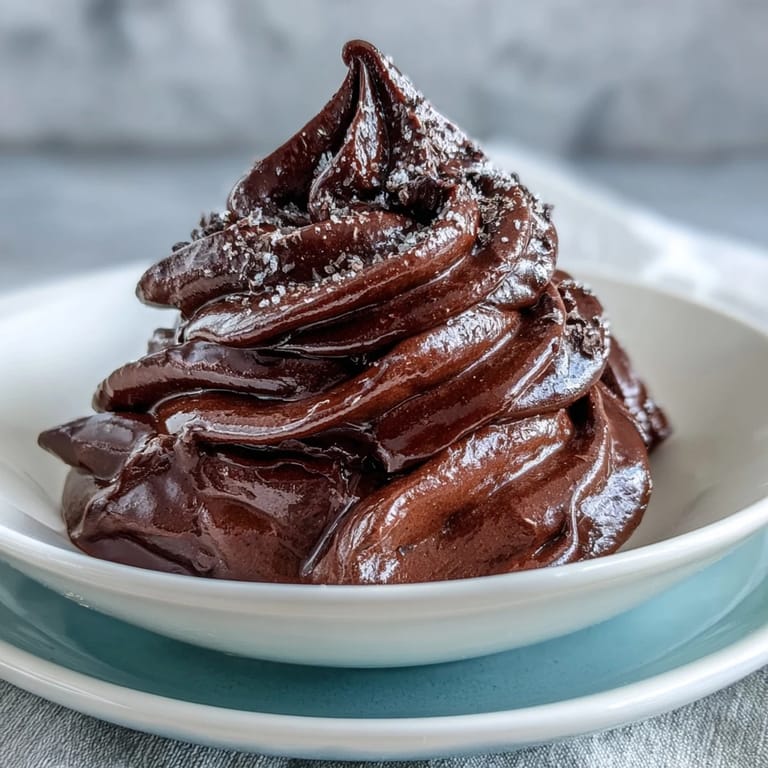
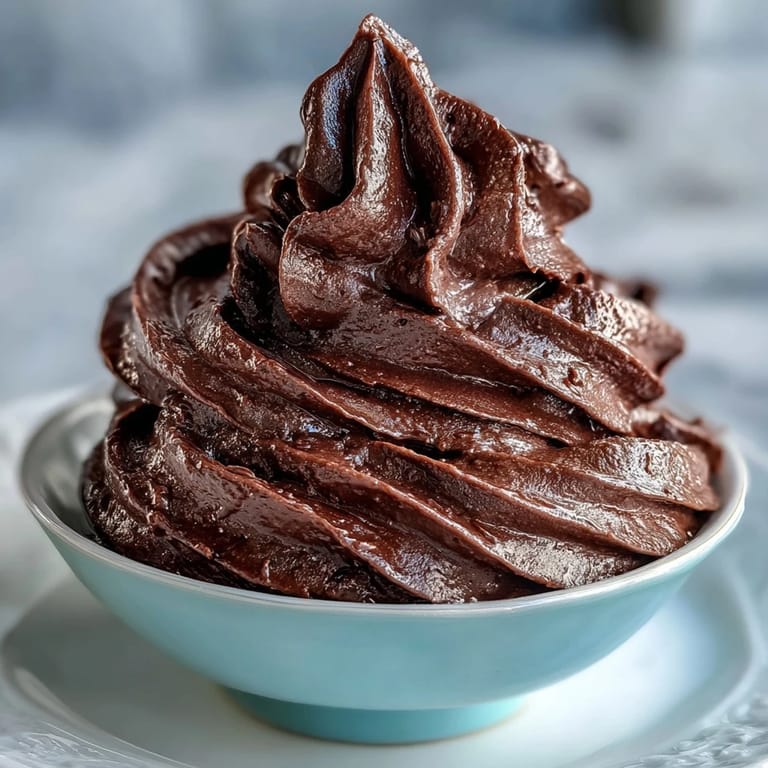
 There's a particular moment when melted chocolate meets whipped cream and transforms into something impossibly light—that's when I knew this mousse would become my go-to filling for everything from layer cakes to lazy Sunday desserts. Years ago, I watched a French pastry chef fold chocolate into cream with such care that I realized the difference between a dense pudding and an ethereal mousse came down to patience and technique. What started as curiosity in her kitchen became my reliable formula, and now I can't imagine finishing a cake without it. The beauty of this mousse is how forgiving it is; even when you think you've made a mistake, a few careful folds usually fix it. Simple ingredients, big chocolate flavor, and a texture that feels more luxurious than it should.
I'll never forget assembling a birthday cake at 11 PM using this mousse, and how my daughter watched from the kitchen stool as I piped it between layers, asking why it looked like clouds. The next morning, she took a bite and declared it better than any bakery cake—and honestly, she wasn't wrong. That moment of pure joy over something homemade with chocolate mousse in the middle is why I keep coming back to this recipe.
Ingredients
- Semi-sweet chocolate (200g, 55–65% cocoa), chopped: Quality matters more here than anywhere else; this chocolate becomes the soul of your mousse, so invest in something you'd actually enjoy eating on its own.
- Heavy whipping cream (1 cup, cold): Temperature is everything—cold cream whips faster and holds its structure better, so pull it from the fridge right before you need it.
- Powdered sugar (2 tablespoons): This sweetens the cream gently and dissolves instantly; regular sugar would leave a grainy texture.
- Vanilla extract (1 teaspoon pure): Pure vanilla makes a noticeable difference in flavor; it brightens the chocolate without overpowering it.
- Salt (pinch, optional): If your chocolate isn't salted already, a whisper of salt deepens the chocolate flavor in a way that's hard to describe but impossible to ignore once you taste it.
Tired of Takeout? 🥡
Get 10 meals you can make faster than delivery arrives. Seriously.
One email. No spam. Unsubscribe anytime.
Instructions
- Melt the chocolate gently:
- Place your chopped chocolate in a heatproof bowl and set it over simmering water, stirring occasionally until it's completely smooth. If you prefer the microwave route, use 20-second bursts with stirring between each one—this gives you more control and prevents burnt edges. Let it cool to room temperature; warm chocolate will cook the cream and create an oily mess, so patience here is non-negotiable.
- Whip the cream to soft peaks:
- In a chilled bowl, combine your cold cream, powdered sugar, and vanilla, then beat with a mixer until the cream holds its shape but still looks soft and slightly droopy. This is the tricky part because overwhipped cream becomes grainy and separates; you're aiming for that sweet spot where it's fluffy but still plush. Stop the mixer, check the texture by lifting the whisk, and you'll see peaks that gently fold back on themselves.
- Fold chocolate and cream together:
- This is where patience and gentleness matter most—take a spoonful of whipped cream and stir it into the cooled chocolate to loosen the mixture and prevent shock when combining. Then add the remaining cream in 2 or 3 additions, using a rubber spatula to fold slowly and deliberately, rotating the bowl as you go. Each fold should bring the spatula up through the center, across the top, and down the side; keep going until you see no streaks of white or brown, which usually takes less than a minute.
- Chill before serving:
- For a mousse that holds its shape when piping or slicing between cake layers, refrigerate for 30 to 60 minutes until it firms up slightly. If you want to serve it soft and spoonable in cups, you can use it right away or chill for up to 2 hours for a more substantial texture.
 Pin It
 There's something deeply satisfying about watching a simple mousse transform a dessert from ordinary to unforgettable. Whether it's the smile when someone takes that first bite or the relief of knowing you've created something elegant without stress, this filling has a quiet magic about it.
The Science Behind Fluffy Chocolate
The reason this mousse works so beautifully comes down to how air and fat interact; whipped cream is essentially tiny bubbles of fat suspended in liquid, and when you fold in chocolate, you're stabilizing those bubbles without deflating them. This is why cold ingredients, gentle folding, and proper timing make such a difference—rushing any step breaks those delicate bubbles and leaves you with a dense pudding instead of an airy cloud. Understanding this has helped me troubleshoot whenever something goes wrong and adjust future batches accordingly.
Flavor Variations Worth Trying
Once you master the basic formula, you can play with additions in the melted chocolate stage—a splash of strong brewed espresso deepens the chocolate flavor without making it taste like coffee, while a pinch of cinnamon adds warmth and elegance. I've also experimented with almond extract, a touch of Grand Marnier, or even cardamom, and each one transforms the mousse into something special. The key is adding these flavors to the chocolate before mixing with cream so they dissolve smoothly and distribute evenly throughout.
Storage and Make-Ahead Strategy
This mousse is best used the day you make it when the texture is most luxurious, though it keeps covered in the refrigerator for up to 2 days if you need to prep ahead. I've learned not to freeze it because the texture separates when thawed, losing that cloud-like quality that makes it special. If you're assembling a layered cake, you can make the mousse in the morning and apply it to cooled cake layers in the afternoon, giving you a manageable timeline without sacrificing quality.
- Always cover the mousse with plastic wrap pressed directly against the surface to prevent a skin from forming.
- If your mousse sits for a day and firms up too much, a few stirs with a spatula will soften it slightly without destroying the texture.
- For best results, use the mousse within a few hours of chilling for that perfect balance between firm enough to layer and soft enough to taste ethereal.
 Pin It
 This chocolate mousse has become my answer to last-minute dessert cravings and my secret weapon for turning simple cakes into something memorable. Once you make it a few times, it becomes second nature, and you'll find yourself making it for everything from quiet weeknight treats to impressive dinner party finales.