Pin It
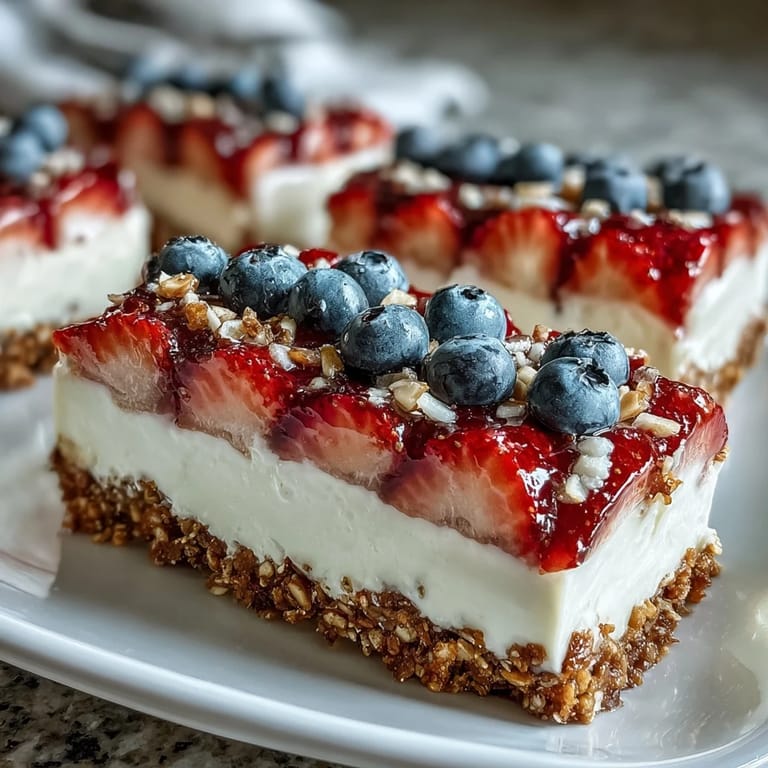
 There's something about Fourth of July that makes me want to bake something that looks as patriotic as it tastes. A few years back, I was scrolling through my phone the night before a neighborhood cookout when this idea of a flag-shaped cheesecake hit me, and I thought—why not make dessert do double duty as decoration? The beauty of this no-bake version is that you don't have to stand over a hot oven on the hottest day of the year, which honestly felt like a small miracle when I realized it.
I'll never forget setting this down on my neighbor's picnic table and watching people's faces light up before they even tasted it. My friend Sarah said it was almost too pretty to cut into, which felt like a win in my book. Once someone dug in, though, it disappeared faster than my ability to explain why I'd made an entire patriotic dessert.
Ingredients
- Graham cracker crumbs (2 cups): The foundation that holds everything together; I learned the hard way that finely crushed crumbs bind better than chunky pieces, so pulse them in a food processor if your box doesn't have fine ones.
- Unsalted butter (1/2 cup, melted): This is what turns dry crumbs into a proper crust that won't crumble when you slice it.
- Granulated sugar (2 tablespoons): A small amount adds just enough sweetness to the crust without overwhelming it.
- Salt (pinch): Brings out the buttery flavor and prevents the crust from tasting flat.
- Cream cheese (16 oz, softened): Must be softened to room temperature or your filling will be lumpy and you'll spend ten minutes beating it; I learned this the annoying way.
- Heavy whipping cream (1 cup, cold): Keep this in the fridge until the last moment—cold cream whips to stiff peaks much faster.
- Powdered sugar (1 cup): Dissolves instantly into the filling, unlike granulated sugar which can create a slightly gritty texture.
- Vanilla extract (1 teaspoon): Choose pure vanilla over imitation if you can; the flavor difference is noticeable and worth it.
- Lemon zest (optional): A subtle brightness that doesn't overpower but makes people wonder what the secret ingredient is.
- Fresh blueberries (1 cup): The stars of the flag design; pick berries that are firm and evenly sized for a neater look.
- Fresh strawberries (1 1/2 cups, sliced): Slice them just before assembly or they'll weep juice all over your pristine white filling.
- Fresh raspberries (1/2 cup, optional): These add deeper color to the stripes and a more complex flavor than strawberries alone.
- Whipped cream (1/2 cup for piping, optional): Elevates the presentation if you're feeling fancy, but honestly the cake is stunning without it.
Tired of Takeout? 🥡
Get 10 meals you can make faster than delivery arrives. Seriously.
One email. No spam. Unsubscribe anytime.
Instructions
- Make the crust foundation:
- Combine your graham cracker crumbs with melted butter, a little sugar, and salt in a bowl, stirring until the mixture looks like damp sand. Every crumb should feel slightly slick with butter, not swimming in it—this ensures the crust holds together without being greasy.
- Press and chill:
- Push this mixture firmly and evenly across the bottom of your 9x13-inch dish using the back of a measuring cup or your fingers to create an even layer about half an inch thick. Stick it in the fridge while you tackle the filling; cold crust layers transfer filling onto it more smoothly.
- Prepare the cream cheese base:
- Beat your softened cream cheese for a full minute until it's light and fluffy, then add powdered sugar, vanilla, and lemon zest if you're using it. The mixture should be completely smooth with no lumps—this is the moment where patience pays off.
- Whip and fold gently:
- In a separate cold bowl, whip your heavy cream to stiff peaks (when you lift the beaters, peaks should stand straight up), then fold it into the cream cheese mixture with a spatula using slow, deliberate movements. Overmixing deflates the cream and makes the filling dense instead of mousse-like.
- Spread and smooth:
- Pour the filling onto your chilled crust and spread it evenly with a spatula, smoothing the top so it's perfectly flat. This is where an offset spatula really shines if you have one, but the back of a regular spatula works fine.
- Build your flag design:
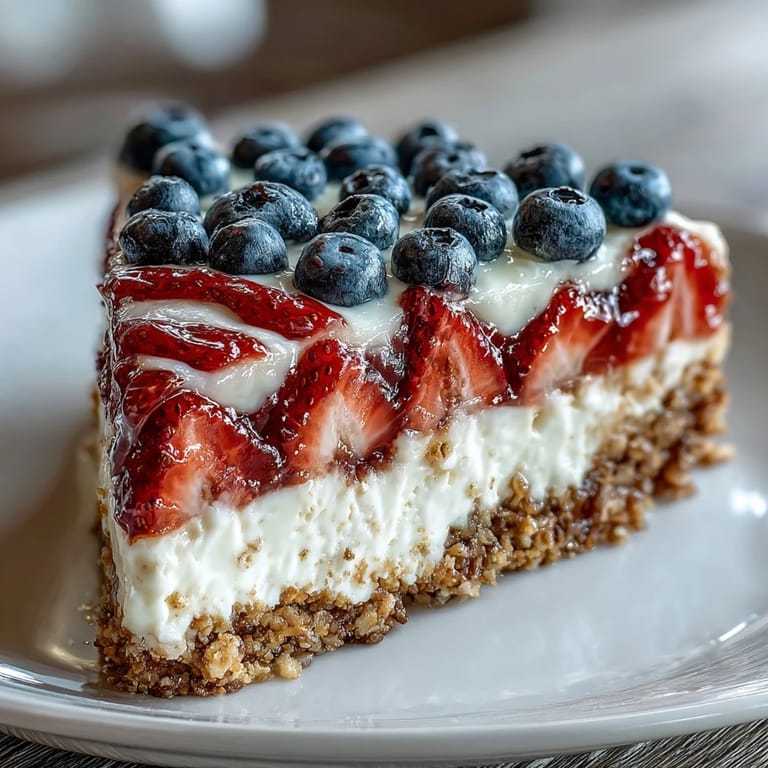
- Press blueberries into the upper left corner of your cake to create the blue canton section of the flag. This is the fun part—arrange them in neat rows and columns for a polished look, or go free-form if you're feeling casual.
- Create the stripes:
- Lay rows of sliced strawberries across the cake from left to right, alternating with rows of plain filling or raspberry slices if you want deeper red. Think of it like painting stripes—each row should be about the same width as your berry slices.
- Add extra definition (optional):
- If you're piping whipped cream between the rows, do this gently in thin lines; it helps separate the colors visually and makes the flag shape even clearer. A steady hand helps, but wobbly lines are charming in their own way.
- Chill and set:
- Cover the cake loosely with plastic wrap and refrigerate for at least 4 hours, though overnight is even better. The cheesecake needs time to set firmly so it slices cleanly without sliding around.
- Slice and serve:
- Run a warm knife under hot water and wipe it dry between each slice to keep things looking neat. The slight warmth helps you cut through the cake without dragging the fruit around.
 Pin It
 There was this moment when my daughter helped me arrange the berries and she got so focused on making the blueberry stars perfect that she forgot to complain about the heat. That's when I realized this dessert wasn't just about having something red, white, and blue on the dessert table—it was about the calm focus that comes from creating something beautiful together.
Make-Ahead Magic
This cake actually improves if you make it a day ahead because the flavors meld and the texture becomes even more silky. I've found that assembling the crust and filling the night before, then adding the berries a couple hours before serving, keeps everything looking fresh and prevents the fruit from releasing too much juice into the cake. If you're hosting a cookout, this means one major task is already done, and you can focus your energy on everything else.
Customizing Your Flag
The beauty of this design is that it's completely flexible—I've made versions with raspberries instead of strawberries for a deeper crimson color, and once I used blackberries for a mysterious dark purple stripe that somehow worked. You could also swap the filling for a lighter lemon-flavored cheesecake, or add a thin layer of raspberry jam between the crust and filling for extra flavor. The flag shape is so iconic that people will recognize it no matter what berries you choose.
Storage and Serving Tips
This cake actually travels well if you need to transport it to a potluck—just keep it in the baking dish, cover it with plastic wrap, and place it on a sturdy surface in your car or cooler. Once people start eating, cover any leftovers and refrigerate them; they'll keep for up to 3 days and still taste wonderful straight from the fridge.
- Don't slice this dessert more than a few minutes before serving, or the exposed filling will start to dry out slightly at the edges.
- If your berries are particularly juicy, you can brush them lightly with a tiny amount of cornstarch slurry beforehand to prevent excess weeping onto the filling.
- This recipe easily doubles for a larger crowd—just use a 9x13-inch dish for the crust and filling, then a second one for the topping berries if you want maximum berry coverage.
 Pin It
 There's something deeply satisfying about serving a dessert that's both delicious and patriotic, especially when you've barely turned on your oven. This cake has become my go-to Fourth of July contribution because it tastes like summer and looks like celebration.
Your Questions Answered
- → What makes this cheesecake no-bake?
This cheesecake sets by chilling in the refrigerator, using whipped cream and cream cheese to achieve a creamy texture without baking.
- → Can I use gluten-free crackers for the crust?
Yes, substituting gluten-free graham crackers maintains the crust’s texture while accommodating dietary needs.
- → How do I achieve the flag design with berries?
Blueberries are placed in the top corner for the stars section, while sliced strawberries and raspberries alternate across rows to mimic stripes.
- → Is lemon zest necessary in the filling?
Lemon zest is optional but adds a subtle brightness that balances the richness of the cream cheese and whipped cream.
- → Can this dessert be made ahead of time?
Yes, you can prepare it up to 24 hours in advance; adding fresh berries just before serving keeps them vibrant.
- → What tools are recommended for preparation?
Use mixing bowls, an electric or stand mixer, a silicone spatula, and a 9x13-inch baking dish for best results.