 Pin It
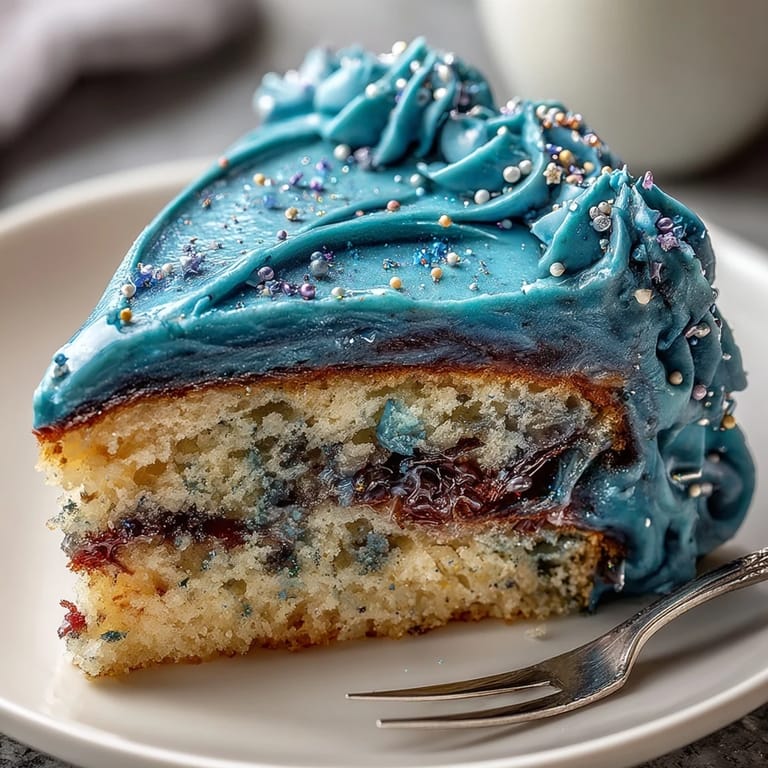
 My friend's birthday fell on the spring equinox, and she'd just mentioned being a Pisces in passing during coffee that morning. By afternoon, I found myself staring at a Pinterest board of galaxy cakes, thinking about how to capture that dreamy, oceanic energy she carried around. The idea hit differently this time—not just decorating a cake, but making something that felt like her zodiac sign in buttercream form, complete with swirls of midnight blue and purple that seemed to hold actual starlight.
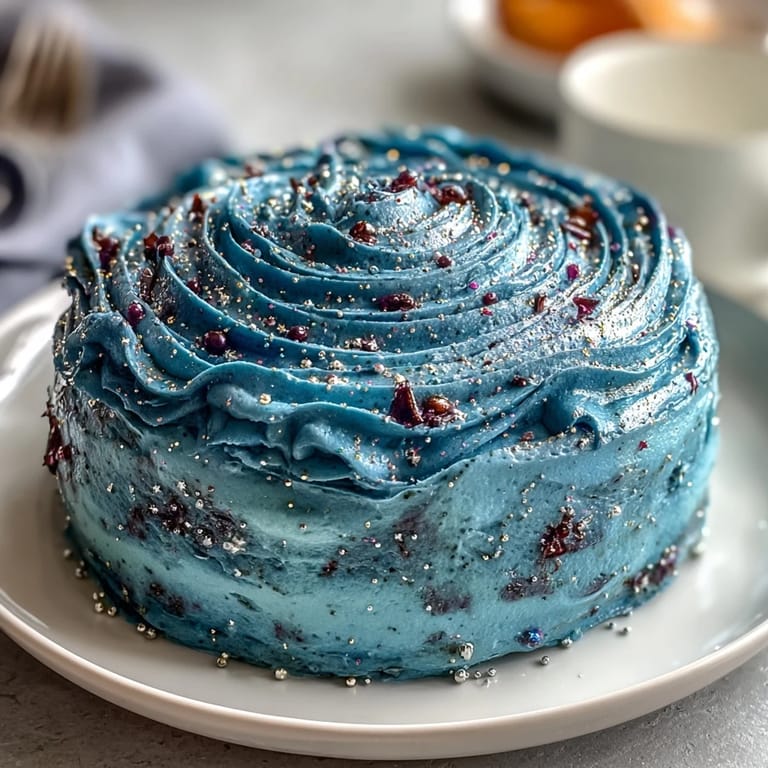
I'll never forget frosting this cake at midnight because I'd procrastinated and suddenly her party was hours away. My sister wandered into the kitchen, saw the purple and navy swirls happening under my offset spatula, and just sat at the counter watching like I was performing magic. When I finally shook that edible glitter over the whole thing, it caught the kitchen light and she literally said, "Oh, it's alive," which somehow made the whole rushed situation feel perfect.
Ingredients
- All-purpose flour (2 ½ cups): This is your cake's foundation, and using it at room temperature matters more than people think—it integrates into the batter way more smoothly.
- Baking powder (2 ½ tsp): Don't skip the pre-sifting step even though it feels fussy; lumps of baking powder create weird dense pockets.
- Unsalted butter (1 cup for sponge): Room temperature is non-negotiable here—cold butter won't cream properly and you'll end up with a denser cake than intended.
- Granulated sugar (2 cups): This creams with the butter to trap air, which gives you that light, tender crumb everyone loves.
- Large eggs (4): Also room temperature; cold eggs will shock the batter and you lose that aeration magic.
- Pure vanilla extract (1 tbsp plus 2 tsp): The pure stuff matters—imitation extract tastes thin and hollow by comparison, especially in a vanilla-forward cake.
- Whole milk (1 cup): Room temperature again (I'm sensing a pattern), and whole milk creates a richer, more tender crumb than skim.
- Unsalted butter for buttercream (1 ½ cups): This needs to be soft but not greasy; if it's too warm, your frosting becomes runny.
- Powdered sugar (5 cups, sifted): Sifting removes those little hard lumps that never dissolve, giving you silky, lump-free frosting.
- Gel food coloring: These are concentrated and won't water down your buttercream like liquid colors do, keeping it thick and pipeable.
- Edible glitter: This is where the magic lives; splurge on quality shimmer because cheap glitter tastes metallic and chalky.
Tired of Takeout? 🥡
Get 10 meals you can make faster than delivery arrives. Seriously.
One email. No spam. Unsubscribe anytime.
Instructions
- Prep your pans like you mean it:
- Grease three 8-inch round pans thoroughly, then line the bottoms with parchment circles—this sounds tedious but prevents sticking and makes your cake layers come out pristine. Preheat to 350°F while you're setting up.
- Build your dry mixture:
- Whisk together flour, baking powder, and salt in a bowl; this distributes the leavening evenly so you don't get weird dense spots. Set aside and don't overthink it.
- Cream butter and sugar until fluffy:
- This takes 3–4 minutes with an electric mixer, and you'll notice the mixture go from grainy and pale yellow to light, almost cloud-like. This step is what gives your cake its tender crumb, so don't rush it.
- Add eggs one by one:
- Beat well after each egg hits the bowl; this keeps the mixture emulsified and prevents it from looking curdled. It's okay if it looks slightly broken at first—vanilla extract smooths it right out.
- Alternate dry and wet:
- Start with flour, then milk, then flour again—this prevents overmixing and keeps your batter tender. Mix until just combined; overmixing develops gluten and makes the cake tough.
- Divide and bake:
- Pour batter evenly into pans, then bake for 25–30 minutes until a toothpick comes out clean. The kitchen smells absolutely incredible at this point.
- Cool properly:
- Let cakes sit in their pans for 10 minutes to set slightly, then turn out onto wire racks. This prevents them from breaking apart.
- Make your buttercream base:
- Beat soft butter until creamy, then gradually add sifted powdered sugar, milk, and vanilla—going slow prevents powdered sugar explosions and keeps the texture smooth. Keep beating until it's fluffy and spreadable, about 2–3 minutes total.
- Color your cosmos:
- Divide buttercream into four bowls and add gel coloring to each—navy blue, purple, teal, and black create that galaxy effect. Start with tiny amounts of color; you can always add more.
- Layer and swirl:
- Place a cake layer on your stand, dollop alternating colors of buttercream around, then swirl gently with an offset spatula—imagine you're creating nebulae, not perfection. This is the part where happy accidents happen.
- Glitter is your finale:
- Sprinkle edible glitter generously over the entire cake, really lean into it; this is what makes people's eyes light up. If you're feeling fancy, brush a tiny bit of clear vodka on the cake first so glitter adheres better and shimmers even more.
- Chill to set:
- Pop the whole cake in the fridge for 30 minutes so the buttercream firms up and the design stays put when you slice.
 Pin It
 There's something about a cake that makes people feel genuinely seen—like you translated their entire energy into sugar and butter. When she cut into it and the purple and blue swirls revealed themselves, with that shimmer catching the light, she got this quiet smile that said everything.
Temperature Matters More Than You'd Think
Room temperature ingredients aren't just a suggestion; they're the difference between a tender, fluffy cake and a dense, tight one. When butter, eggs, and milk are all the same warm temperature, they emulsify together smoothly, trapping tiny air bubbles that make your cake rise evenly. I learned this the hard way by grabbing cold eggs from the fridge and wondering why my batter looked separated and my cake came out with a weird heavy bottom layer.
Why Gel Color Over Liquid
Liquid food coloring contains water, which is the enemy of buttercream—it thins the frosting and makes it greasy and slippery. Gel coloring is concentrated and water-free, so you can get saturated, beautiful colors while keeping your buttercream thick enough to swirl and hold its shape. I made this mistake early on and ended up with frosting that looked more like paint and felt greasy on the tongue.
The Secret Life of Edible Glitter
Not all edible glitter tastes good—some brands have a chalky, metallic aftertaste that lingers uncomfortably. Quality shimmer glitter from specialty baking supply stores costs a bit more but transforms the whole experience; it catches light like actual starlight and tastes nearly neutral. I've also learned that brushing a tiny bit of clear alcohol (vodka, gin, whatever's in your cabinet) onto the buttercream before sprinkling glitter makes it adhere better and shimmer more dramatically.
- Apply glitter to set buttercream, not warm, or it'll sink and disappear.
- Use quality brands—they taste cleaner and shimmer more convincingly.
- A light hand with a brush goes further than heavy-handed shaking from the jar.
 Pin It
 This cake has become my go-to birthday gift for anyone who loves color, shimmer, or just needs something that feels special. It's fancy enough to impress but forgiving enough that even a late-night baker can pull it off.
Your Questions Answered
- → How do I achieve the galaxy swirl effect?
Divide the buttercream into different bowls, tinting each with various blue, purple, teal, and black colors. Apply spoonfuls alternately on each cake layer and sides, then gently swirl with an offset spatula to blend the shades without overmixing.
- → Can I substitute ingredients for dietary preferences?
Yes, you can use gluten-free flour for gluten sensitivity and consider almond extract instead of vanilla for a different flavor twist. The cake is naturally vegetarian.
- → What is the best way to add edible glitter without it falling off?
Sprinkle the edible glitter generously after applying the buttercream and, for extra shine, lightly brush the surface with a clear alcohol like vodka before adding glitter to help it adhere.
- → How long does the cake take to prepare and bake?
Preparation takes about 45 minutes, with 35 minutes baking time, totaling approximately 1 hour and 20 minutes to complete.
- → What tools are recommended for assembling this cake?
Use an electric mixer for buttercream, 8-inch cake pans, mixing bowls, an offset spatula for swirling buttercream, parchment paper for lining pans, and a food-safe brush for glitter application.
- → Can I decorate the cake with Pisces symbols?
Yes, you may optionally use white fondant to craft Pisces symbols or stars and add silver star sprinkles to enhance the zodiac theme.